Visual Studio For Mac Mdf File
Git is a distributed version control system that allows teams to work on the same documents simultaneously. This means there is a single server that contains all the files, but whenever a repository is checked out from this central source, the entire repository is cloned locally to your machine.
There are many remote hosts that allow you to work with Git for version control, however the most common host is GitHub. The following example uses a GitHub host, but you can use any Git host for version control in Visual Studio for Mac.
Visual Studio Code is free and available on your favorite platform - Linux, macOS, and Windows. Download Visual Studio Code to experience a redefined code editor, optimized for building and debugging modern web and cloud applications. Download Visual Studio Code - Mac, Linux, Windows.
If you wish to use GitHub, make sure that you have an account created and configured before following the steps in this article.
Creating a remote repo on GitHub
The following example uses a GitHub host, but you can use any Git host for version control in Visual Studio for Mac.
To set up a Git repository, execute the following steps:
Create a new Git repo at github.com:
Set Repo Name, description, and privacy. Do not initialize Repo. Set .gitignore and license to None:
The next page gives you an option to display and copy either the HTTPS or SSH address to the repo you have created:
You'll need the HTTPS address to point Visual Studio for Mac to this repo.
Publishing an existing project
If you have an existing project that is not already in version control, use the following steps to set it up in Git:
Select the Solution name from the Solution Pad in Visual Studio for Mac.
In the Menu bar, select Version Control > Publish in Version Control to display the Select Repository dialog:
If this menu item appears greyed out in the menu, make sure you have selected the Solution name.
Choose the Registered Repositories tab and press the Add button:
Enter the name of the repository as you would like it to display locally, and paste in the URL from step #3. Your Repository Configuration dialog should look similar to the following. Press OK:
It is also possible to use SSH to connect to Git.
To attempt to publish the app to Git, select the repository, and ensure that both Module Name and Message text fields are completed:
Click Okay, and then Publish from the alert dialog.
In the Git Credentials window, enter your GitHub username and password.
Note
If your account has two-factor authentication (2FA) enabled, you will need to create an Access Token, which is used in place of a password. If you have not created an access token, follow the steps in the Git Access Token documentation.
Free download Adobe Muse CC 2018 for MacOS it is a web design program, as is Adobe Dreamweaver. However, while Adobe Dreamweaver is for the person who is more experienced with web design and writing code, Muse CC is for the amateur. You don’t need to know how to write code to use Muse CC. Adobe Muse is one of the amazing program designed for Mac users. It allows the developers to create dynamic, engaging and high-quality responsive websites. This application is useful for developing websites without any expertise and experience. Similarly, there are many fascinating and powerful options for creating elegant websites. Adobe Muse Mac CC 2019 Adobe Muse is the answer for all those designers that want to be able to easily create a website without having to worry about writing a single line of code. Adobe Muse CC is a best quality software for designing and publishing complete web sites without code. Here Adobe Muse CC latest version direct download for Mac OS. Adobe muse for mac. Adobe Muse for Mac is a really simple web editor that enables you to develop and design websites without writing a single line of code. Those of you who have been using computers for years now will surely remember Frontpage, the easy web editor created by Microsoft.
Enter the username and Personal Access Token, and press Okay:
After a few seconds, the Solution should be published with its initial commit. Confirm it has been published by browsing the Version Control menu item, which should now be populated with many options:
Once you start to make additional changes, select Push Changes to push the changes to the remote repository. This will allow all appropriate users to view it on github.com:
Publishing a new project
The new project dialog can be used to create a new project with a local git repository. To enable it, select the Use git for version control checkbox, as illustrated in the following screenshot. This will initialize your repo and add an optional .gitignore file:
Follow the steps below to push your new local repository to a new GitHub repository:
Note
If you have not already created a GitHub repository, refer to the Creating a remote repo on GitHub section.
Create your first commit by going to Version Control > Review Solution and Commit in the Menu Bar.
In the Status tab, choose Commit in the top left.
Write a commit message, for example 'First Commit', then click on Commit:
Next, in the Menu Bar go to Version Control > Manage Branches and Remotes.
Go to the Remote Sources tab, then click Add.
In the Remote Source window, add the details of your previously created GitHub repository and click OK:
Close the Git Repository Configuration window, then in the Menu Bar go to Version Control > Push Changes.
In the Push to Repository window click on the Push Changes button:
When prompted, enter your GitHub username and password.
Note
If your account has two-factor authentication (2FA) enabled, you will need to create an Access Token, which is used in place of a password. If you have not created an access token, follow the steps in the Git Access Token documentation.
Visual Studio for Mac will now push the changes to your remote GitHub repository:
Check out an existing repository
It's likely that you'll have to work with a GitHub repo that exists only on the remote, not on your local machine. Visual Studio for Mac allows you to check this repo out quickly. Follow the steps below to clone it to your machine:
In the Menu bar, select Version Control > Checkout:
This displays the Connect to Repository tab:
On the GitHub page of the remote repository, press the Clone or Download button and copy the URL provided:
Replace all the text in the URL entry field in the Connect to Repository tab. This will populate most other fields in this tab for you, as illustrated in the image in step #2.
Enter the directory that you want to clone the repo into and press Checkout.
Note
You may experience issues if the repo is over 4 GB in size.

Troubleshooting
If you have issues with initializing your project with an empty remote repository, you can try the following steps:
- Go to your solution folder.
- Press Command + Shift + . to show the hidden files and folders.
- If there's a .git folder, delete it.
- If there's a gitignore file, delete it.
- Press Command + Shift + . to hide the files and folders.
- Open your solution in VS for Mac.
- On the solution Pad, select your solution node.
- Browse to the Version Control menu and choose Publish in Version Control.
- Follow the steps of the above tutorial starting from the step 6.
See also
| title | ms.date | ms.topic | helpviewer_keywords | author | ms.author | manager | ms.workload |
|---|---|---|---|---|---|---|---|
11/04/2016 |
| ghogen |
This topic describes the options for upgrading a database file (.mdf) after you install a newer version of Visual Studio. It includes instructions for the following tasks:
Upgrade a database file to use a newer version of SQL Server Express LocalDB
Upgrade a database file to use a newer version of SQL Server Express
Work with a database file in Visual Studio but retain compatibility with an older version of SQL Server Express or LocalDB
Make SQL Server Express the default database engine Bulk mailer 8 2 keygen crack mac.
You can use Visual Studio to open a project that contains a database file (.mdf) that was created by using an older version of SQL Server Express or LocalDB. However, to continue to develop your project in Visual Studio, you must have that version of SQL Server Express or LocalDB installed on the same machine as Visual Studio, or you must upgrade the database file. If you upgrade the database file, you won't be able to access it by using older versions of SQL Server Express or LocalDB.
You may also be prompted to upgrade a database file that was created through an earlier version of SQL Server Express or LocalDB if the version of the file isn't compatible with the instance of SQL Server Express or LocalDB that's currently installed. To resolve the issue, Visual Studio will prompt you to upgrade the file.
[!IMPORTANT]We recommend that you back up the database file before you upgrade it.
[!WARNING]If you upgrade an .mdf file that was created in LocalDB 2014 (V12) 32 bit to LocalDB 2016 (V13) or later, you will not be able to open the file again in the 32-bit version of LocalDB.
Before you upgrade a database, consider the following criteria:
Don't upgrade if you want to work on your project in both an older version and a newer version of Visual Studio.
Don't upgrade if your application will be used in environments that use SQL Server Express rather than LocalDB.
Don't upgrade if your application uses remote connections, because LocalDB doesn't accept them.
Don't upgrade if your application relies on Internet Information Services (IIS).
Consider upgrading if you want to test database applications in a sandbox environment but don't want to administer a database.
To upgrade a database file to use the LocalDB version
In Server Explorer, select the Connect to Database button.
In the Add Connection dialog box, specify the following information:
Data Source:
Microsoft SQL Server (SqlClient)Server Name:
To use the default version:
(localdb)MSSQLLocalDB. This will specify either ProjectV12 or ProjectV13, depending on which version of Visual Studio is installed and when the first LocalDB instance was created. The MSSQLLocalDB node in SQL Server Object Explorer shows which version it is pointing to.To use a specific version:
(localdb)ProjectsV12or(localdb)ProjectsV13, where V12 is LocalDB 2014 and V13 is LocalDB 2016.
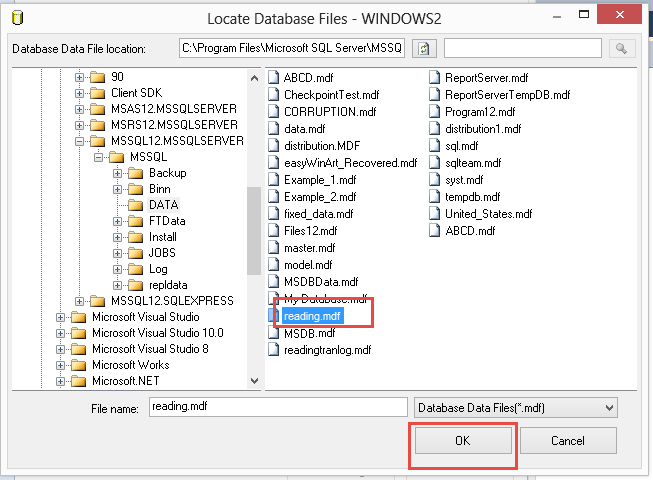
Attach a database file: The physical path of the primary .mdf file.
Logical Name: The name that you want to use with the file.
Select the OK button.
When you're prompted, select the Yes button to upgrade the file.
The database is upgraded, is attached to the LocalDB database engine, and is no longer compatible with the older version of LocalDB.
You can also modify a SQL Server Express connection to use LocalDB by opening the shortcut menu for the connection and then selecting Modify Connection. In the Modify Connection dialog box, change the server name to (LocalDB)MSSQLLocalDB. In the Advanced Properties dialog box, make sure that User Instance is set to False.
To upgrade a database file to use the SQL Server Express version
On the shortcut menu for the connection to the database, select Modify Connection.
In the Modify Connection dialog box, select the Advanced button.
In the Advanced Properties dialog box, select the OK button without changing the server name.
The database file is upgraded to match the current version of SQL Server Express.
To work with the database in Visual Studio but retain compatibility with SQL Server Express
In Visual Studio, open the project without upgrading it.
To run the project, select the F5 key.
To edit the database, open the .mdf file in Solution Explorer, and expand the node in Server Explorer to work with your database.
To make SQL Server Express the default database engine
On the menu bar, select Tools > Options.
In the Options dialog box, expand the Database Tools options, and then select Data Connections.
In the SQL Server Instance Name text box, specify the name of the instance of SQL Server Express or LocalDB that you want to use. If the instance isn't named, specify
.SQLEXPRESS or (LocalDB)MSSQLLocalDB.Select the OK button.
SQL Server Express will be the default database engine for your applications.